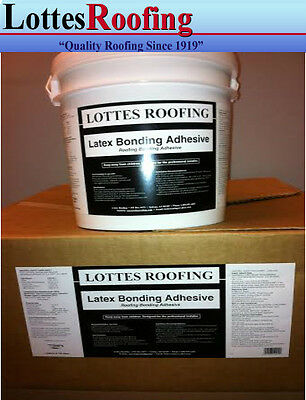
1 – 4 gal Latex EPDM AND TPO RUBBER ROOFING GLUE Bonding Adhesive
$64.62
275
Condition: New
Item must be returned within: 14 Days
Brand: lottes
Refund will be given as: Money Back
Subject Area: building materials
Country/Region of Manufacture: United States
All returns accepted: Returns Accepted
Lottes Roofing
126 Point West Blvd
St. Charles, MO 63303
“Over 30 years experience in single ply flat roofing products!”
This is 1 – 4 gal pail of Latex bonding adhesive 40 lbs and is Class C-60
The actual can may be white or a different color in lieu of black, but the application instructions are the same as the product
is exactly the same regardless of the exterior can color.
Summary of My Selling Policies
Payment
All Credit Cards, Company Certified Checks, Bank Checks, Bank Wire, PayPal
Fees
No sales taxes UNLESS in specific states locals
Shipping
US and International
Delivery
24-48 hours to ship the liner NORMALLY on in stock items, not counting weekends or holidays
Refunds & Returns
Returns accepted on qualified items with RGA return number
BID WITH CONFIDENCE
Not recommended to be used in temperatures lower than 50*. Temperature needs to be above 50* for 24 hours for full cure.
FREE
DELIVERY
IN 48 states!
Please provide your shipping address, city, state and zip code
Check out my
other items
This is
latex bonding adhesive to adhere the EPDM or TPO rubber to the roofing insulation or substrate. This is a latex based single surface bonding adhesive with coverage of about 400 sq. ft. per pail. This is a BONDING Adhesive to adhere or bond the EPDM or TPO to a substrate of wood, plywood, OSB or metal. This is NOT a seaming product that will seam EPDM to EPDM or TPO to TPO, you must use a SEAMING product like black seaming adhesive or vulcanizing seaming tape which we have available for that type of application. This adhesive is a SINGLE surface laminate adhesive that is to be used in a WET condition.
Please allow time for the adhesive to become “tacky” which usually occurs in about 5 minutes or so.
DO NOT ALLOW the adhesive to become dry before you lay in the roofing membrane. APPLY roofing membrane while the adhesive is
Tacky NOT WET
. So 1- 4 gal pail will cover about 300 – 400 square feet of finished roof area.
Method of Applying EPDM with heavy bodied latex bonding adhesive and 3
”
seam tape application as required.
·
1
Clean the roof surface of all shingle debris and nails. Re-fasten any loose roof boards.
·
2
Fill any gaps larger than 3/8” inch with wooden strips. The EPDM cannot span gaps of more than 3/8″ without risk of possible adhesion issues.
·
3
Start at the bottom of the roof and roll out the EPDM from one side of the roof to the other and let it sit for 10-15 minutes. Fold bottom half of the membrane onto the top half of the in place membrane
·
4
Apply the bonding adhesive to the exposed roof deck and NOT to the EPDM membrane as the adhesive is to be applied as a one surface WET LAMINATE using a notched trowel to spread the adhesive in a pattern over the decking.
Allow the adhesive time to become “tacky”. S
lowly fold the EPDM roofing membrane back into place while the adhesive is still wet. To ensure adhesive transfer and a good bond, use a stiff bristled push broom and force the membrane into contact with the adhesive on the roof deck. Repeat the process on the other half of the EPDM membrane.
·
5
Roll out the next piece of membrane, allowing a four to six inch overlap on the piece below it. This overlap is crucial to allow enough overlap between the two pieces and to allow the water to flow from the upper part of the roof down to the roof edge. This is also to allow enough room to apply the primer and 3”seam tape if required to splice 2 pieces of EPDM deck sheet together.
·
6
Adhere this section in the same manner as the first section. Continue adding sections until you have covered your roof.
Seam tape application if required to join 2 sheets together
•Position sheets of liner and align edges to required overlap. Mark bottom sheet to indicate top sheet location, then folding back top sheet.
•Clean and/or prime the seam area of both rubber sheets using FastSeam EPDM Liner Primer. CAUTION: wear protective gloves and read all labels and instructions when using EPDM Liner Primer or unleaded gas to clean and prime the seam area
•Make guide marks for the splice tape much as in Step 1, except that the new marks will be 1/2″ out from the edges of the bottom sheet.
•Fold back top sheet. Begin unrolling splice tape by aligning the edge of the paper with the marks in step 3. Continue along the full length of the seam.
•With the paper backing still attached to the tape, use a roller to ensure good contact. Place the top sheet of rubber back over the applied tape.
•Remove the paper backing by pulling out from under the top sheet at a 45ºangle. Allow top sheet to fall freely onto exposed splice tape. Roll entire seam with roller.
Just a note. FREE shipping is ONLY to the lower US 48 states. All other locations will have additional freight, fees, and charges as well as any and all International customs and duties as applicable.
Contact us for Volume Discounts
Buy 3 items get 5% EXTRA Discount off items pricing
Buy 5 items get 8% EXTRA Discount off items pricing
We currently only ship to the lower 48 sates, not Alaska or Hawaii


